
사용 의도
- 넥슨에서 메이플스토리의 캐릭터 정보를 실시간으로 제공하게 되었으며, 그에 따라 캐릭터 정보를 실시간으로 조회할지, 아니면 날짜를 선택해서 조회할지를 결정하는 기능을 구현하게 되었다.
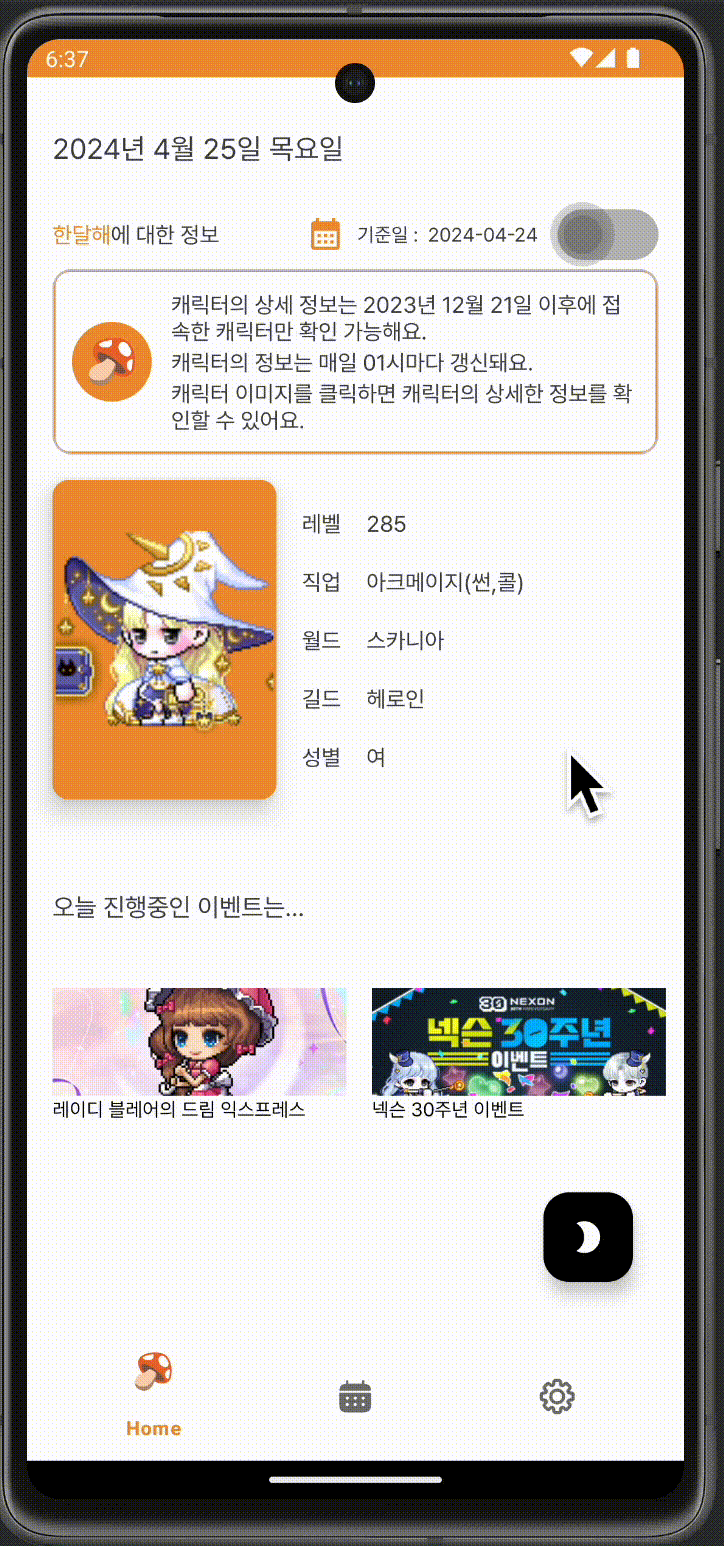
- 조회 날짜 선택 모드일 때 달력 모양의 이미지 버튼이 생기며, 버튼을 누르면 달력 Dialog가 나오고 여기서 날짜를 선택할 수 있게 하였다.
- 그리고 달력을 좌우 스와이프로 달력을 바꿀 수 있도록 하고 싶었기 때문에, 기존에 사용하던 RecyclerView + ListAdapter가 아닌 ViewPager2를 사용하게 되었다.
학습 내용
ViewPager2는 Fragment 간 화면 슬라이드를 가능하게 하는 라이브러리이다.
- ViewPager2는 화면 슬라이드에 자동으로 애니메이션을 적용할 수 있다. 이 애니메이션은 사실 따로 구현할 필요는 없다. ViewPager2 라이브러리 내에 페이지 전환을 위한 스와이프 동작이 내장되어 있기 때문이다.
ViewPager2는 FragmentStateAdapter라는 페이지 Adapter를 사용하는데, 이것이 RecyclerView.Adapter<VH>를 상속하고 있다.
- 따라서 ViewPager2도 RecyclerView의 일종이라고 할 수 있다.
개발자는 FragmentStateAdapter를 상속한 Adapter 클래스를 선언하고, 다음과 같은 메소드를 재정의하여야만 한다.
- createFragment() : ViewPager2에서 보여줄 Fragment를 생성한다.

💡 지정된 position과 연결된 새로운 Fragment를 생성한다. Adapter는 Fragment의 생명 주기를 담당한다 :
Fragment는 Adapter의 Item을 보여주는 데 사용된다.
Fragment가 Viewport에서 많이 멀어지면 인스턴스는 파괴되고 상태만 저장된다. 다시 Viewport에 가까워지면 새로운 Fragment로 이전에 저장된 상태를 사용하여 인스턴스를 초기화한다.
- 즉 우리는 createFragment()를 재정의하여, 어떤 Fragment를 Adapter의 Item으로 사용할지를 결정하여야만 한다.
- 이를 위해 Fragment를 선언하고, 여기서 나는 달력 UI를 구성하기 위한 Custom View를 구현하여 Fragment 내부에 배치되도록 하였다.
- getItemCount() : 페이지의 개수를 반환한다. 즉 FragmentStateAdapter에서는 페이지 하나가 Item이 된다는 것을 확인할 수 있다.
- 나는 거의 무한정으로 스와이프가 되는 달력을 만들고 싶어서 Int32비트의 최대값인 2,147,483,647을 Item의 최대 개수로 설정해두었다. 이렇게 되면 사실 무한정은 아니지만 한 방향으로 10억 번 이상 스와이프를 할 사람은 없을 것이라고 생각한다.
- getItemId() : ListAdapter를 생각해보면 Item의 고유한 Id를 지정해주고, DiffUtil의 areItemsTheSame() 에서 Id를 비교함으로써 Item을 구분하는 과정을 거쳤다. 마찬가지로 FragmentStateAdapter에서도 달력 페이지를 구분함으로써 어떤 달력이 몇 년 몇 월을 나타내는지를 Id로써 구분하여야만 한다.
💡 기본적으로 추가, 이동, 제거되지 않는 컬렉션에 대하여 동작한다.
TODO : 재정의하거나, containsItem(long)까지 재정의하는 경우 Lint 규칙을 추가한다. Item이 컬렉션의 일부가 아닌 경우 RecyclerView.NO_ID를 return한다.
매개변수 : Item이 Adapter의 어디에 위치할지를 나타내는 position
리턴값 : RecyclerView.Adapter의 hasStableIds() 가 true면 return되는 정적인 Id값
- 이를 위해, 특정 날짜의 연월을 기준으로 잡고, 좌측으로 스와이프하여 position이 감소하면 연월을 감소시키고 우측으로 스와이프하여 position이 증가하면 연월도 증가키며, 페이지의 고유한 Id는 연 * 1000 + 월(ex) 2024년 4월이면 202404)로 지정해주도록 getItemId() 를 재정의하였다.
Custom View를 사용하는 이유는 다음과 같다.
- RecyclerView와 ListAdapter를 사용하는 경우, 7 * 7개의 Item을 GridLayout 형태로 ViewType을 구분하여 추가해주는 방식으로 구현한다.
- 하지만 기존에 CalendarFragment에서 RecyclerView로 구현한 달력 UI는 ListAdapter를 사용하여 날짜 Item에 고유한 Id를 부여함으로써 DiffUtil을 통해 Item을 비교하도록 하였는데도 다소 느리다는 느낌이 들었다.
- 그런데 이것을 Custom View를 사용함으로써 다소 느린 렌더링 문제를 해결할 수 있게 되었다. 또한, Custom View를 장비창 UI의 스타포스를 나타내기 위해 사용하려고 하였기 때문에 미리 학습해보자는 차원에서 사용하게 되었다.
- ViewGroup과 View를 하나씩 선언한다. 날짜 정보가 포함된 View는 ViewGroup을 구성하는 Item들이 된다.
- Custom View의 가장 큰 특징은 재사용성으로, 동일한 View를 여러 번 사용해야 할 경우에 유용하며, 나는 날짜를 나타내는 숫자를 그려내는 View를 최대 42번 사용하고 특정 View를 터치할 때 발생하는 이벤트를 좀 더 세밀하게 정의하고 싶었다.
ViewPager2와 Custom View를 함께 사용함으로써 좌우 스와이프가 가능한, 사용자들이 사용하기에 불편함을 느끼지 않을 정도로 렌더링이 빠른 달력 UI를 구현하였다.
적용 방법
먼저 Custom View를 구현하기에 앞서, Custom View에서 사용할 스타일과 속성을 정의할 것이다.
<resources xmlns:tools="http://schemas.android.com/tools">

    <style name="Calendar.CalendarViewStyle">

        <item name="calendarItemHeight">44dp</item>

    </style>

    <style name="Calendar.CalendarItemViewStyle">

        <item name="calendarItemTextSize">14sp</item>

        <item name="calendarItemFontFamily">@font/pretendardregular</item>

    </style>

</resources><resources>
<declare-styleable name="CalendarView">
<attr name="android:fontFamily" />
<attr name="calendarViewStyle" format="reference" />
<attr name="calendarItemViewStyle" format="reference" />
<attr name="calendarItemHeight" format="dimension" />
<attr name="calendarItemTextSize" format="dimension" />
<attr name="calendarItemFontFamily" format="reference|integer" />
</declare-styleable>
</resources>- 다음과 같이 속성과 스타일을 정의한다.
- 속성에는 예를 들면 날짜를 나타내는 텍스트의 크기나 폰트 등 정의할 속성을 선언한다.
- themes.xml에 사용할 스타일을 만들고 해당 스타일에서 사용할 속성을 정의한다.
다음으로, 날짜를 나타낼 View를 선언한다.
class CalendarItemView @JvmOverloads constructor(
    context: Context,
    attrs: AttributeSet? = null,
    defStyleAttr: Int = R.attr.calendarItemViewStyle,
    defStyleRes: Int = R.style.Calendar_CalendarItemViewStyle,
    private val year: Int = 0,
    private val month: Int = 0,
    private val day: Int = 0,
    private val dayOfWeek: String = "",
    private val viewModel: MainViewModel? = null
) : View(ContextThemeWrapper(context, defStyleRes), attrs, defStyleAttr) {

    private val dayBounds = Rect()
    private val dayOfWeekBounds = Rect()
    private val dayPaint = TextPaint()
    private val dayOfWeekPaint = TextPaint()

    init {
        context.withStyledAttributes(attrs, R.styleable.CalendarView, defStyleAttr, defStyleRes) {
            setBackgroundColor(context.resources.getColor(R.color.white, context.theme))
            dayPaint.apply {
                isAntiAlias = true
                textSize = getDimensionPixelSize(
                    R.styleable.CalendarView_calendarItemTextSize,
                    0
                ).toFloat()
                color = getDateColor(year, month, day)
                typeface = getFont(R.styleable.CalendarView_calendarItemFontFamily)
                if ((dayOfWeek == "") && !isSearchDateRange(year, month, day)) {
                    alpha = 50
                    color = context.resources.getColor(R.color.gray, context.theme)
                }
            }
            dayOfWeekPaint.apply {
                isAntiAlias = true
                textSize = getDimensionPixelSize(
                    R.styleable.CalendarView_calendarItemTextSize,
                    0
                ).toFloat()
                color = getDayOfWeekColor(dayOfWeek)
                typeface = getFont(R.styleable.CalendarView_calendarItemFontFamily)
            }
        }
    }

    override fun onTouchEvent(event: MotionEvent?): Boolean {
        event ?: return true

        if ((dayOfWeek != "") || !isSearchDateRange(year, month, day)) return true

        when (event.actionMasked) {
            MotionEvent.ACTION_DOWN -> {
                setBackgroundColor(context.resources.getColor(R.color.main, context.theme))
                invalidate()
            }

            MotionEvent.ACTION_UP -> {
                setBackgroundColor(context.resources.getColor(R.color.white, context.theme))
                invalidate()
                viewModel?.selectSearchDate(year, month, day)
            }

            MotionEvent.ACTION_MOVE -> {
                setBackgroundColor(context.resources.getColor(R.color.main, context.theme))
                invalidate()
            }

            MotionEvent.ACTION_CANCEL -> {
                setBackgroundColor(context.resources.getColor(R.color.white, context.theme))
                invalidate()
            }
        }

        return true
    }

    override fun onDraw(canvas: Canvas) {
        super.onDraw(canvas)

        if (day == -1) return

        if (dayOfWeek == "") {
            val nowDate = day.toString()
            dayPaint.getTextBounds(nowDate, 0, nowDate.length, dayBounds)
            canvas.drawText(
                nowDate,
                (width / 2 - dayBounds.width() / 2).toFloat() - 2,
                (height / 2 + dayBounds.height() / 2).toFloat(),
                dayPaint
            )
        } else {
            dayOfWeekPaint.getTextBounds(dayOfWeek, 0, dayOfWeek.length, dayOfWeekBounds)
            canvas.drawText(
                dayOfWeek,
                (width / 2 - dayOfWeekBounds.width() / 2).toFloat() - 2,
                (height / 2 + dayOfWeekBounds.height() / 2).toFloat(),
                dayOfWeekPaint
            )
            setBackgroundColor(context.resources.getColor(R.color.gray, context.theme))
        }
    }
}- 날짜 Text를 그려낼 TextPaint를 선언 및 정의하고, drawText()로 Text를 그려내도록 onDraw() 메소드를 재정의한다.
- 먼저 날짜를 나타내는 day를 String 타입으로 변환하고, TextPaint의 TextBound를 day의 길이만큼 지정한 후 TextPaint를 사용해서 drawText()로 Text를 그려낸다.
- 이 때 날짜를 그릴 위치를 지정하는데, 시작점을 지정한다. 시작점의 x좌표는 View 전체 너비의 절반 지점에서 TextBound의 너비의 절반만큼 뺀 값이고, y좌표는 View 전체 높이의 절반 지점에서 TextBound의 높이의 절반만큼을 더한 값이다.
- 또한, View가 그릴 Text가 날짜일 수도 있고 요일일 수도 있는데, dayOfWeek이 빈 문자열이 아니라면 요일로 판단하고, 빈 문자열이라면 날짜로 판단한다.
- 요일이면 배경색을 회색으로 변경하고 터치해도 아무런 이벤트가 호출되지 않도록 한다.
- 날짜라면 day가 -1인 경우 달력의 빈 부분으로 아무 것도 그리지 않는다. 그게 아니라면 날짜 Text를 그려낸다. 날짜가 2023년 12월 21일부터 어제 날짜 사이가 아니라면 Text의 투명도를 절반으로 한다.
- 날짜를 터치하여 이벤트가 발생하도록 onTouchEvent()를 재정의한다.
- 터치한 View가 2023년 12월 21일부터 어제 날짜 사이의 날짜 정보를 가지고 있다면 이벤트가 발생하도록 한다.
- MotionEvent.ACTION_DOWN : 터치를 위해 손가락을 단말기에 갖다대었을 때, 이 때부터 해당 날짜를 터치했음을 알려주기 위해 배경색을 변경한다.
- MotionEvent.ACTION_MOVE : 터치를 한 상태에서 손가락을 움직여 터치 이벤트가 발생한 지점이 변경될 때, 이 때에도 해당 날짜가 터치가 된 상태임을 알려주기 위해 변경된 배경색을 유지한다.
- MotionEvent.ACTION_UP : 손가락을 떼었을 때를 의미하며, 배경색을 바꿔준 후 ViewModel에서 정의해 둔 조회 날짜 선택 메소드를 호출한다.
- MotionEvent.ACTION_CANCEL : 터치 이벤트를 부모 View가 가져갔을 때, 이 때는 터치가 취소되었다는 것을 나타내기 위해 배경색을 원래대로 되돌린다.
- 터치한 View가 2023년 12월 21일부터 어제 날짜 사이의 날짜 정보를 가지고 있다면 이벤트가 발생하도록 한다.
마지막으로 여러 개의 날짜 View를 구성할 ViewGroup을 구현한다.
class CalendarView @JvmOverloads constructor(
    context: Context,
    attrs: AttributeSet? = null,
    defStyleAttr: Int = R.attr.calendarViewStyle,
    defStyleRes: Int = R.style.Calendar_CalendarViewStyle
) : ViewGroup(context, attrs, defStyleAttr, defStyleRes) {

    private val dayOfWeeks = listOf<String>("일", "월", "화", "수", "목", "금", "토")
    private var _calendarItemHeight: Float = 0F

    init {
        context.withStyledAttributes(attrs, R.styleable.CalendarView, defStyleAttr, defStyleRes) {
            _calendarItemHeight = getDimension(R.styleable.CalendarView_calendarItemHeight, 0F)
        }
    }

    override fun onMeasure(widthMeasureSpec: Int, heightMeasureSpec: Int) {
        val width = getDefaultSize(suggestedMinimumWidth, widthMeasureSpec)
        val height = paddingTop + paddingBottom + max(
            suggestedMinimumHeight,
            (_calendarItemHeight * WEEKS_PER_MONTH).toInt()
        )
        setMeasuredDimension(width, height)
    }

    override fun onLayout(changed: Boolean, left: Int, top: Int, right: Int, bottom: Int) {
        val childWidth = (width / DAYS_PER_WEEK).toFloat()
        val childHeight = (height / WEEKS_PER_MONTH).toFloat()
        var calendarItemIndex = 0

        children.forEach { view ->
            val itemLeft = (calendarItemIndex % DAYS_PER_WEEK) * childWidth
            val itemTop = (calendarItemIndex / DAYS_PER_WEEK) * childHeight

            view.layout(
                itemLeft.toInt(),
                itemTop.toInt(),
                (itemLeft + childWidth).toInt(),
                (itemTop + childHeight).toInt()
            )

            calendarItemIndex++
        }
    }

    fun initCalendarView(year: Int, month: Int, daysOfMonth: List<Int>, viewModel: MainViewModel) {
        for (dayOfWeek in dayOfWeeks) {
            addView(
                CalendarItemView(
                    context = context,
                    dayOfWeek = dayOfWeek,
                    viewModel = viewModel
                )
            )
        }
        for (index in daysOfMonth.indices) {
            addView(
                CalendarItemView(
                    context = context,
                    year = year,
                    month = month,
                    day = daysOfMonth[index],
                    viewModel = viewModel
                )
            )
        }
    }
}- ViewGroup의 너비와 높이를 측정하기 위한 onMeasure()와 ViewGroup을 구성하는 View의 위치를 정하고 배치하기 위한 onLayout()을 재정의한다.
- 마지막으로 CalendarItemView를 ViewGroup에 추가하는 initCalendarView()라는 함수를 선언한다.
다음으로, ViewPager2를 사용하기 위해 Adapter의 Item 역할을 하는 Fragment를 선언한다.
class CustomCalendarFragment : Fragment() {

    private val viewModel: MainViewModel by activityViewModels()
    private lateinit var binding: FragmentCustomCalendarBinding

    override fun onCreateView(
        inflater: LayoutInflater, container: ViewGroup?,
        savedInstanceState: Bundle?
    ): View {
        binding = FragmentCustomCalendarBinding.inflate(inflater, container, false)

        return binding.root
    }

    override fun onViewCreated(view: View, savedInstanceState: Bundle?) {
        super.onViewCreated(view, savedInstanceState)

        binding.vm = viewModel

        arguments?.let { argument ->
            val year = argument.getLong("year").toInt()
            val month = argument.getLong("month").toInt()
            val text = "${year}년 ${month}월"
            binding.tvDateInfoCustomCalendar.text = text
            binding.calendarViewCustomCalendar.initCalendarView(
                year,
                month,
                getDaysOfMonth(year, month),
                viewModel
            )
        }
    }

    companion object {

        fun newInstance(itemId: Long) = CustomCalendarFragment().apply {
            arguments = Bundle().apply {
                putLong("year", itemId / 100L)
                putLong("month", itemId % 100L)
            }
        }
    }
}
<?xml version="1.0" encoding="utf-8"?>
<layout xmlns:android="http://schemas.android.com/apk/res/android"
xmlns:app="http://schemas.android.com/apk/res-auto"
xmlns:tools="http://schemas.android.com/tools">
<data>
<variable
name="vm"
type="com.bodan.maplecalendar.presentation.views.MainViewModel" />
</data>
<androidx.constraintlayout.widget.ConstraintLayout
android:layout_width="match_parent"
android:layout_height="wrap_content"
android:background="@color/white"
android:padding="20dp"
tools:context=".presentation.views.lobby.CustomCalendarFragment">
<TextView
android:id="@+id/tv_date_info_custom_calendar"
android:layout_width="0dp"
android:layout_height="wrap_content"
android:fontFamily="@font/pretendardregular"
android:paddingTop="20dp"
android:paddingBottom="20dp"
android:textAlignment="center"
android:textColor="@color/black"
android:textSize="28sp"
app:layout_constraintEnd_toEndOf="parent"
app:layout_constraintStart_toStartOf="parent"
app:layout_constraintTop_toTopOf="parent" />
<com.bodan.maplecalendar.presentation.views.lobby.CalendarView
android:id="@+id/calendar_view_custom_calendar"
android:layout_width="wrap_content"
android:layout_height="wrap_content"
android:layout_marginStart="20dp"
android:layout_marginEnd="20dp"
android:layout_marginBottom="20dp"
app:layout_constraintBottom_toBottomOf="parent"
app:layout_constraintEnd_toEndOf="@id/tv_date_info_custom_calendar"
app:layout_constraintStart_toStartOf="@id/tv_date_info_custom_calendar"
app:layout_constraintTop_toBottomOf="@id/tv_date_info_custom_calendar" />
</androidx.constraintlayout.widget.ConstraintLayout>
</layout>- 해당 Fragment에는 연월을 나타내는 TextView 하나와, 아까 구현해 둔 Custom View를 배치한다.
- Kotlin 코드 내부에서, adapter가 Fragment를 생성하면서 추가한 연월 정보를 바탕으로 ViewGroup에 정의한 initCalendarView() 메소드를 호출함으로써 7 * 7개의 Custom View를 ViewGroup에 추가한다.
- 연월 정보는 해당 Fragment의 Id를 통해서 구할 수 있다.
그리고 ViewPager2의 adapter 역할을 하는 FragmentStateAdapter를 상속받은 adapter 클래스를 하나 선언한다.
class CustomCalendarAdapter(fm: FragmentActivity) : FragmentStateAdapter(fm) {

    private val dateFormatConverter = DateFormatConverter()

    override fun getItemCount(): Int = Int.MAX_VALUE

    override fun createFragment(position: Int): CustomCalendarFragment {
        val itemId = getItemId(position)

        return CustomCalendarFragment.newInstance(itemId)
    }

    override fun getItemId(position: Int): Long {
        val searchDate =
            MainApplication.mySharedPreferences.getSearchDate("searchDate", null) ?: return 0
        var currentYear = searchDate.substring(0, 4).toInt()
        var currentMonth = searchDate.substring(5, 7).toInt()

        val move = position - START_POSITION
        val bias = if (move < 0) -1 else 1

        val moveYear = abs(move) / 12 * bias
        val moveMonth = abs(move) % 12 * bias

        currentYear += moveYear
        when {
            (currentMonth + moveMonth) < 1 -> {
                currentMonth = 12 + (currentMonth + moveMonth)
                currentYear--
            }

            (currentMonth + moveMonth) > 12 -> {
                currentMonth = (currentMonth + moveMonth) - 12
                currentYear++
            }

            else -> {
                currentMonth = (currentMonth + moveMonth)
            }
        }

        return (currentYear * 100 + currentMonth).toLong()
    }

    override fun containsItem(itemId: Long): Boolean {
        val nowMonth =
            ((dateFormatConverter.todayYear() * 100) + dateFormatConverter.todayMonth() + 1).toLong()

        return ((itemId > 202311L) && (itemId < nowMonth))
    }

    companion object {
        const val START_POSITION = Int.MAX_VALUE / 2
    }
}- createFragment()는 앞서 선언한 CustomCalendarFragment를 return하는데, 이 때 getItemId()로 결정한 ItemId를 매개변수로써 사용한다.
- getItemId()에서는 ViewPager2의 Item이 될 Fragment의 Id를 결정한다. 먼저 ViewPager2의 시작 position에 배치될 Fragment의 Id는 마지막으로 설정한 조회 날짜가 포함된 연월로 결정한다.
- 좌우 스와이프가 되어 이루어지는 position의 증감에 따라 바뀌는 연월에 맞춰 Fragment들의 Id를 결정하게 된다.
마지막으로, ViewPager2를 배치하기 위한 DialogFragment를 선언한다.
class SearchDateFragment : BaseDialogFragment<FragmentSearchDateBinding>(R.layout.fragment_search_date) {

    private val viewModel: MainViewModel by activityViewModels()
    private lateinit var customCalendarAdapter: CustomCalendarAdapter

    override fun onViewCreated(view: View, savedInstanceState: Bundle?) {
        super.onViewCreated(view, savedInstanceState)

        initAdapter()
        initCustomCalendar()

        binding.vm = viewModel

        lifecycleScope.launch {
            viewModel.lobbyUiEvent.collectLatest { uiEvent ->
                if (uiEvent == LobbyUiEvent.CloseSearchDate) dismiss()
            }
        }
    }

    private fun initAdapter() {
        customCalendarAdapter = CustomCalendarAdapter(requireActivity())
    }

    private fun initCustomCalendar() {
        with(binding.vpSearchDate) {
            adapter = customCalendarAdapter
            setCurrentItem(CustomCalendarAdapter.START_POSITION, false)
        }
    }
}
<?xml version="1.0" encoding="utf-8"?>
<layout xmlns:android="http://schemas.android.com/apk/res/android"
xmlns:app="http://schemas.android.com/apk/res-auto"
xmlns:tools="http://schemas.android.com/tools">
<data>
<variable
name="vm"
type="com.bodan.maplecalendar.presentation.views.MainViewModel" />
</data>
<LinearLayout
android:layout_width="match_parent"
android:layout_height="match_parent">
<androidx.constraintlayout.widget.ConstraintLayout
android:layout_width="wrap_content"
android:layout_height="wrap_content"
android:background="@drawable/shape_dialog"
android:elevation="2dp"
tools:context=".presentation.views.lobby.SearchDateFragment">
<androidx.viewpager2.widget.ViewPager2
android:id="@+id/vp_search_date"
android:layout_width="wrap_content"
android:layout_height="wrap_content"
android:padding="12dp"
app:layout_constraintBottom_toBottomOf="parent"
app:layout_constraintEnd_toEndOf="parent"
app:layout_constraintStart_toStartOf="parent"
app:layout_constraintTop_toTopOf="parent" />
</androidx.constraintlayout.widget.ConstraintLayout>
</LinearLayout>
</layout>- ViewPager2를 배치하고, FragmentStateAdapter의 인스턴스를 생성하고 ViewPager2의 adapter를 초기화한다.
결과
좌우 스와이프가 부드럽게 이루어지고, 날짜를 터치하면 해당 날짜로 캐릭터의 정보를 다시 조회한다.
코드
GitHub - littlesam95/MapleCalendar: 🍄 메붕이들을 위한 이벤트 일정 알리미
🍄 메붕이들을 위한 이벤트 일정 알리미. Contribute to littlesam95/MapleCalendar development by creating an account on GitHub.
github.com
'개발 > 안드로이드' 카테고리의 다른 글
| [메이플 캘린더] Custom View로 장비 세부정보 UI에 스타포스를 달아보자 (0) | 2024.05.10 |
|---|---|
| [메이플 캘린더] Hilt와 Clean Architecture (0) | 2024.05.03 |
| [메이플 캘린더] 위로 스와이프 시 새로고침 기능을 구현해보자 (0) | 2024.01.24 |
| [메이플 캘린더] RecyclerView로 원하는 달력 View를 만들어보자 (0) | 2024.01.22 |
| [메이플 캘린더] 다크 모드에 대응해보자 (0) | 2024.01.18 |